

Winter is the perfect time to take pictures inside. So, let’s make a light box. Above are some of the supplies you’ll need to make the frame. PVC pipe and connectors, PVC Cement, something to cut the pipe with, Plexiglas. You’ll also need fabric to wrap around it, to create your backdrop and lights.
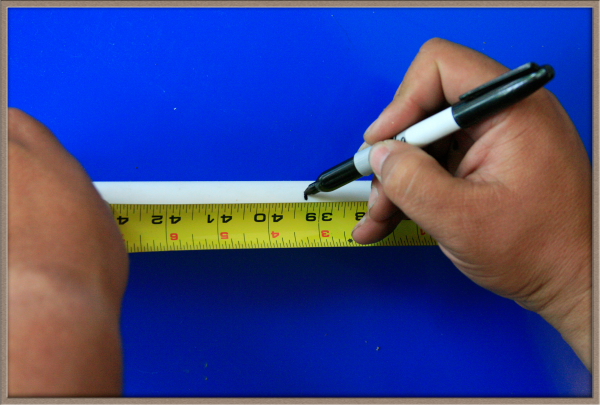
I won’t go into lengths, as you will want to decide what size you want your box to be. We made ours 2’x4’ and at least 2’ tall. You can tell by the pictures we did this in the fall so I really don’t remember our exact dimensions.
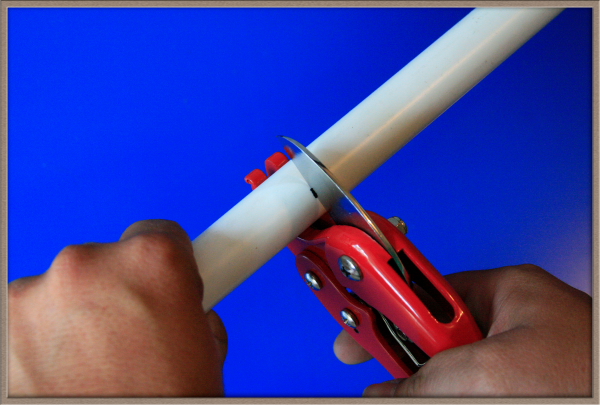
A pipe cutter is so easy to use! I totally recommend figuring one into your project.

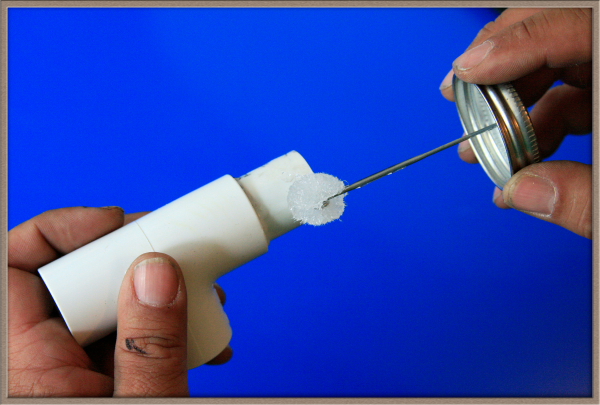
We cut some PVC pipe in short pieces to use on the ends. Then used some cement (glue) on it, as well as. . .
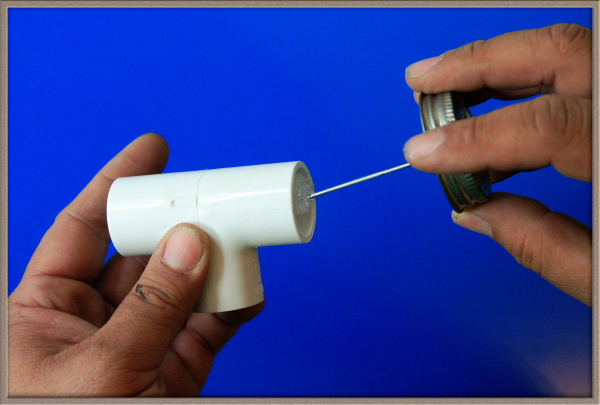
putting glue inside the connector.
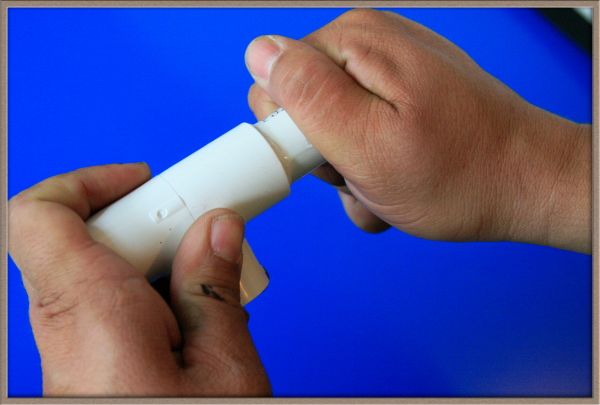
Then we pushed them together tightly. The cement dries pretty quickly.
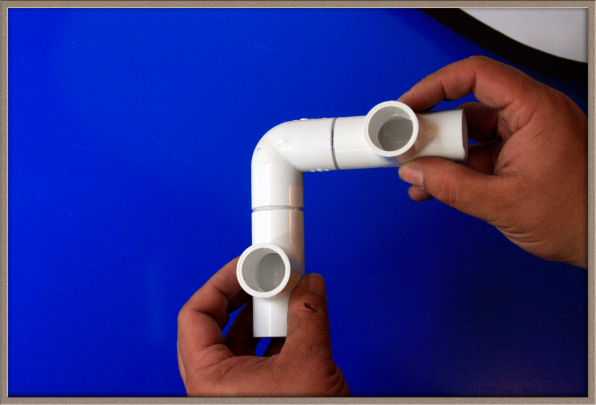
We then put cement on the exposed end of pipe. . .
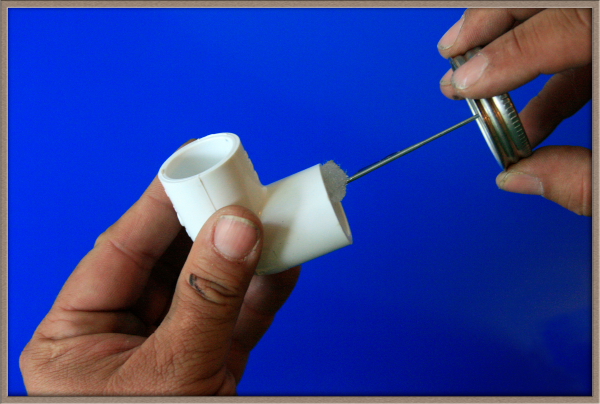
. . .and a corner connector.

Then squished them tightly together.
And twisted them into proper alignment quickly, before the glue set.
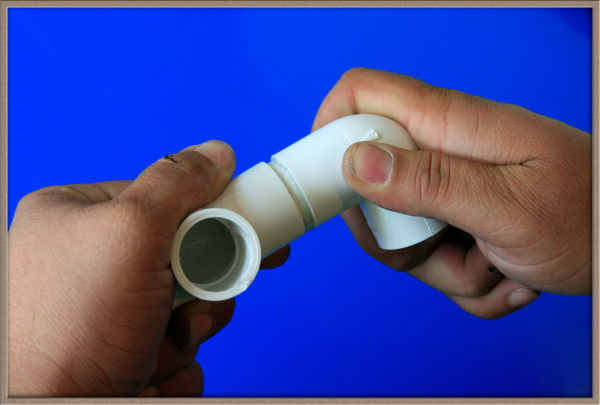
This is how it should look when you’re done. Then you just repeat the above steps on the other end of the corner connector.
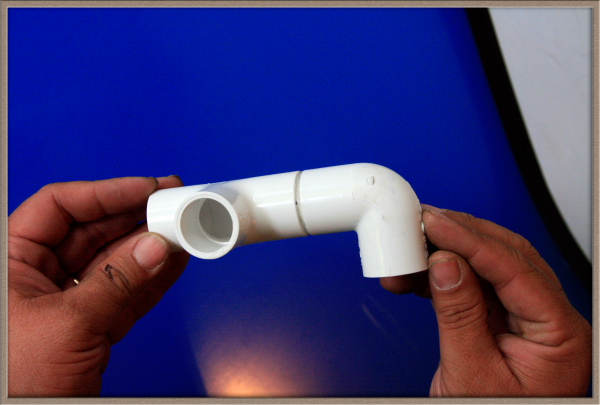
And you should have this. You will need eight of these, or four, depending on how you want to do things.

Cute the pipe in the length you want for the height of your lightbox and glue into the T connectors.
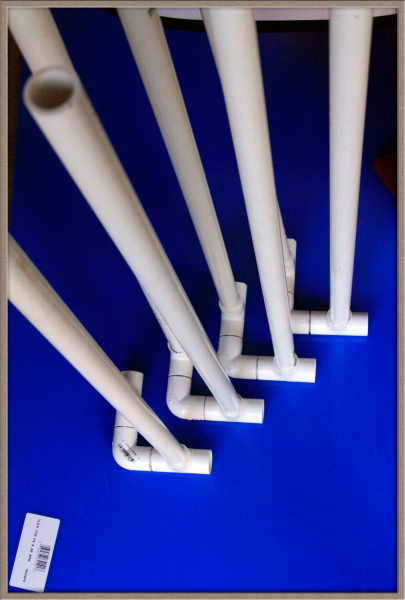
Now we have four corners started.
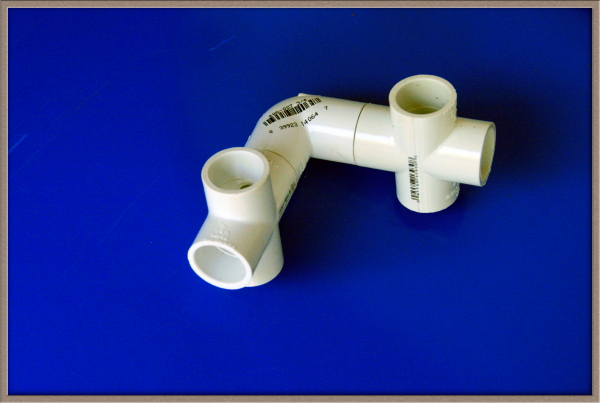
We used cross connectors in place of the T connectors for the other end because we are putting legs on ours, You can do this to keep it elevated slightly or just use the T connectors again to keep in flat.
Here’s one completed corner.
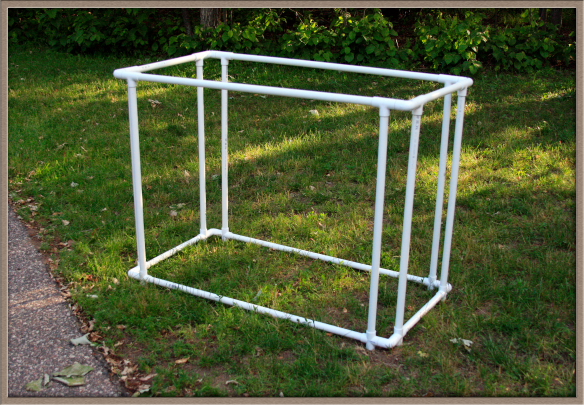
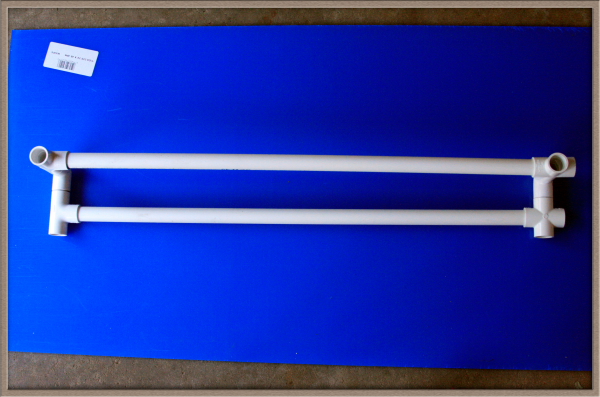
After you cut four pipes to your width, and four to length and glue them all together then it will look like this.
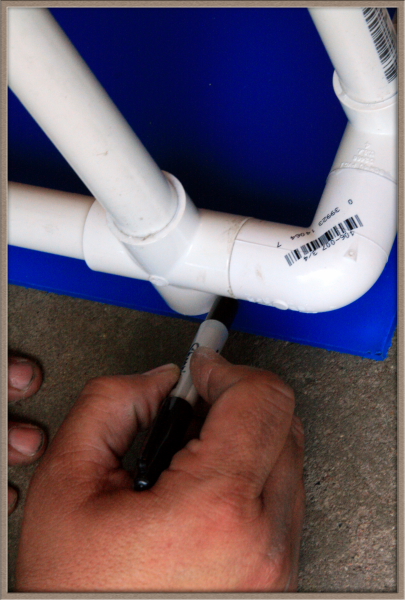
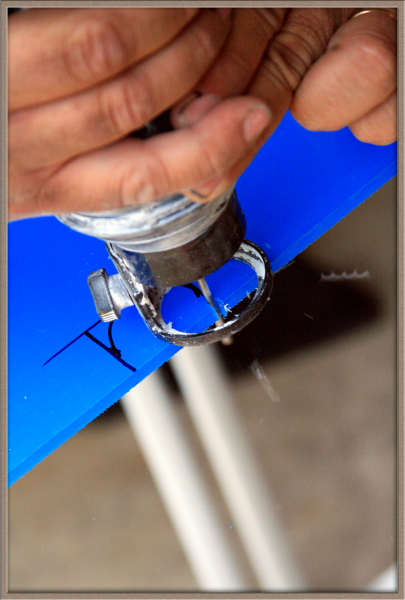
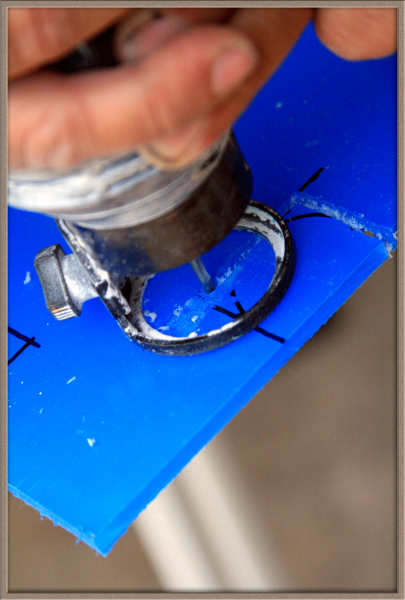
Now it’s time to cut the Plexiglas. We placed the frame on the Plexiglas and marked the corners so we could notch them out.

All of the upright pipes will need to be marked for cutting out.
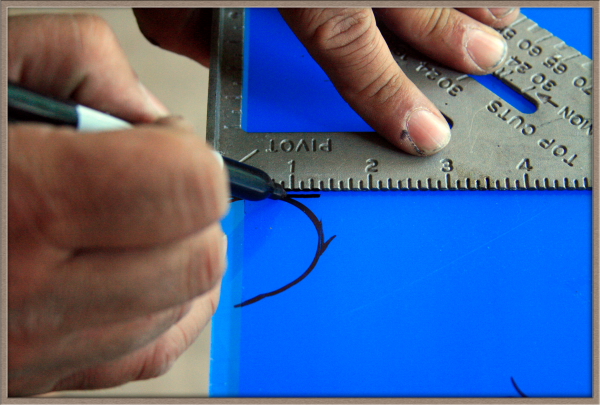
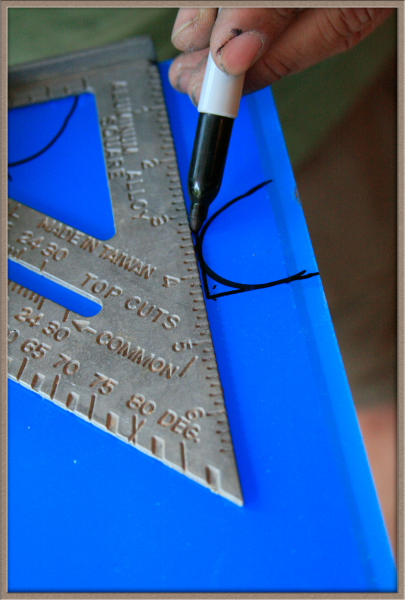
Since we think it would be easier to cut the openings square instead of rounded Dennis used a square to reshape the cut lines.
Now we’re ready to cut.
You can use a dremel to make your cuts.
This particular tool is used for cutting sheetrock/drywall around electrical boxes.
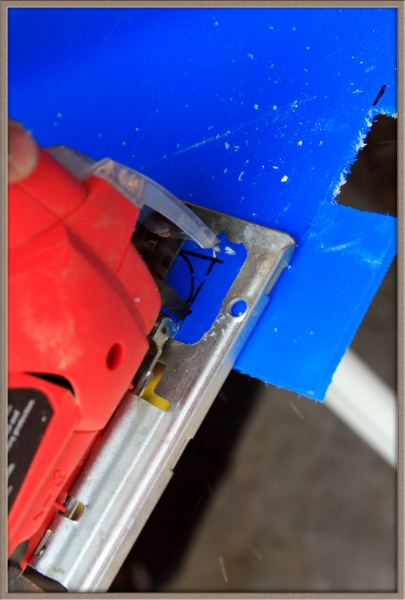
Or you can use a jigsaw.
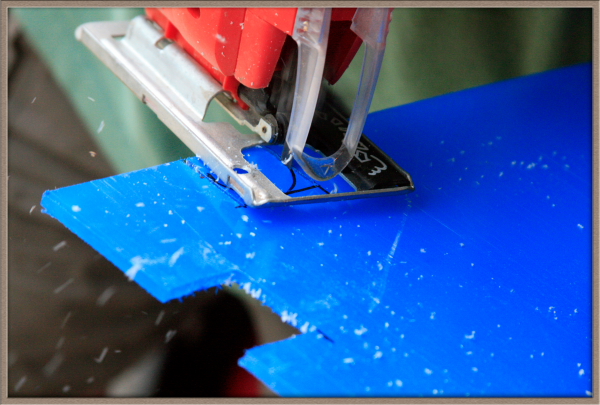
The Plexiglas we chose is too thick to cut with a box knife.
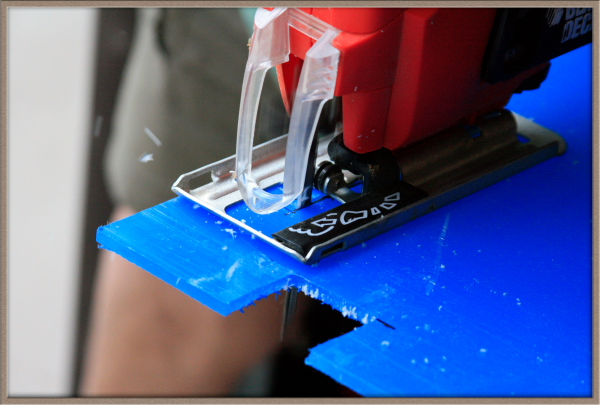
I venture to say, this is the hardest part of the whole project.
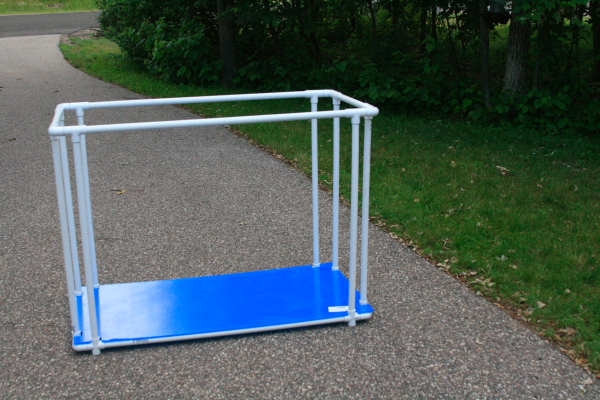
Then pop the Plexiglas into the bottom of your frame. Now it’s probably safe to remove the blue protective film. You can slide different fabrics under for different items you may want to photograph. The color will show through the Plexiglas.
You need a light weight white fabric (I love white flag fabric) to encase it in so your lights can shine through it. I haven’t gotten around to sewing ours yet so I can’t show you those steps. We just have our fabric draped around it and the clamps from the lights are holding it on. It works, so I haven’t made time to finish it up.
Because of the open connectors on the bottom you can cut pipe lengths to make legs for the light box and just use T and corner connectors (like on the top) to give your legs feet.
Clear as mud?
Added: Someone asked about seeing photos in it, you've already seen many but I know that all the photos in this post were taken inside the light box.
and you are handy too!!!
ReplyDeleteThat's very cool, thanks for sharing.
ReplyDeleteWhen do we get to see photos using this?
ReplyDeleteLeedra’s Photos For Fun
Leedra’s Greeting Cards
Photography By Leedra
Looks like a lot of work. I hope you enjoy using it to take some awesome pictures.
ReplyDeleteThat looked really complicated. You are clever and it will be really useful.
ReplyDeleteMade quite simple with excellent shots.
ReplyDeleteGreat idea. :)
ReplyDeleteThanks for the tip.
I have to show this post to my husband. ;)))
Now I know how the pros do it! Wow, Lisa. You're a great teacher.
ReplyDeleteYou forgot to mention a key ingredient: a husband :-) Seriously though, this was a great tutorial...you should produce instruction guides for commercial products!
ReplyDeleteI love this Lisa! I didn't get a chance to comment yesterday, but I was thinking about you and I hope the weight loss goes well.
ReplyDeleteVery cool! You guys are so handy at making your own things. I had to go back and take a look at the yummy goodies. They look so divine. I am craving chocolate this morning and of course, I have none. LOL!
ReplyDeleteHave a great weekend!
You really gotta post an update when the rest of it is completed. I'd like to see how you're using it. I'm having a bit of trouble visualizing how you'd use it... I mean I have a general idea, but the shots you linked to look like you had the fabric on top of the plexiglass, making me wonder if the thing is actually upside down in the last photo.
ReplyDeleteI've done similar stuff, but I've never actually built anything specifically for the purpose. Usually I improvise with foam core artboard as a background and whatever I can find to cover the rest. Then again, most of the shots I've taken of this type have been low light shots with a black backdrop/base (I actually used a black t-shirt a couple of times) and my lighting was usually candles. Or a candle in some cases.
I could use a lesson in how to actually use this... 'cause it looks really handy.
PS: You could probably use a holesaw to do round cutouts for the legs. If you had one the same size as the outside diameter as the pipe that is.
I once saw a tutorial on this very thing, but yours is SO MUCH better. You should submit it to PhotoDoto or someother online photo site - it rocks!
ReplyDeleteI really have no idea what this is but what a detailed tutorial you provided! I'm nowhere near that serious a photographer (or is my husband) but I thought it was great of you to share!
ReplyDeleteingenious!
ReplyDeletevery beautiful blog! I wish I had half of your photographic talent!
ReplyDeleteBlessings...
Thank you for taking the time out to show us this process!! Wow, I am so impressed...and even these photos are beautiful...I love the blue color:)
ReplyDeleteWow! Looks great! I'm still having trouble visualizing how it all looks. I can't wait to see it with the fabric. And BTW I don't think I'd have the patience!
ReplyDeleteI think I know how it will look like eventually, I've been searching tutorial online to make light box and there's few I came across using cardboard , This is much easier to me, but I've yet to ask hubby to help me out. Soon I hope.
ReplyDeleteWow, you could totally teach a class! Very easy to follow directions. Now, do you have any steps to acquiring the best camera? I'm waiting not-so-patiently for the day when I can by a grown-up camera and take pictures for real!
ReplyDeleteoops, I meant 'BUY' a grown-up camera. guess I'm not ready yet.
ReplyDeleteGreat PSF! Oh, and I love those little blue birds up at the top -- very cute!
When I grow up, I wanna be you!
ReplyDelete; )
Nancy
These are great directions..now I need a handy hubby which mine is not....
ReplyDeleteI love how you did all the beginning photos in front of the blue coating. The contrast is gorgeous. Oh, and the box looks great too. One day, one day.
ReplyDeletethat looks like a whole heckuva lot of work, but for someone who can take photos like you, it's worth it
ReplyDeleteWow ... how impressive! Thanks for the specific illustrated instructions.
ReplyDeleteHugs and blessings,